
This is a breakdown of a custom music box I built, combining woodworking, embedded electronics, and audio design to recreate the character of a traditional mechanical movement.

I’ve been woodworking and tinkering since I was a kid, and for just as long, I’ve been drawn to music boxes.
There’s something about them—the mechanical precision, the craftsmanship, the way they reveal themselves—that feels greater than the sum of their parts. They’re simple at a glance, but there’s a subtle magic in how they work. I’ve always wanted to build one.
What finally pulled this project together was the idea of using one of my own melodies. That turned it from a curiosity into something personal—something that brought together woodworking, music, and, inevitably, electronics.
The Concept
My first instinct was to go fully mechanical. A proper music box movement has an elegance that’s hard to beat, and the fact that it can run indefinitely without power gives it an heirloom quality I really like.
That idea quickly fell apart.
Customizable mechanical movements aren’t really accessible without specialized tooling and very tight tolerances. Modifying an existing one sounded even worse—tedious, imprecise, and unlikely to produce something I’d actually be happy with.
So I pivoted.

Electronic Movement
The electronic route was obvious, but not trivial. Before committing, I needed to answer a few questions:
- Would it work reliably every time the lid opens?
- Could it be small and integrated—not just stuffed into the box?
- Could I keep costs low enough to experiment without hesitation?
- Most importantly: could I preserve the character of a real music box?
A cheap speaker and MP3 player wasn’t going to cut it.
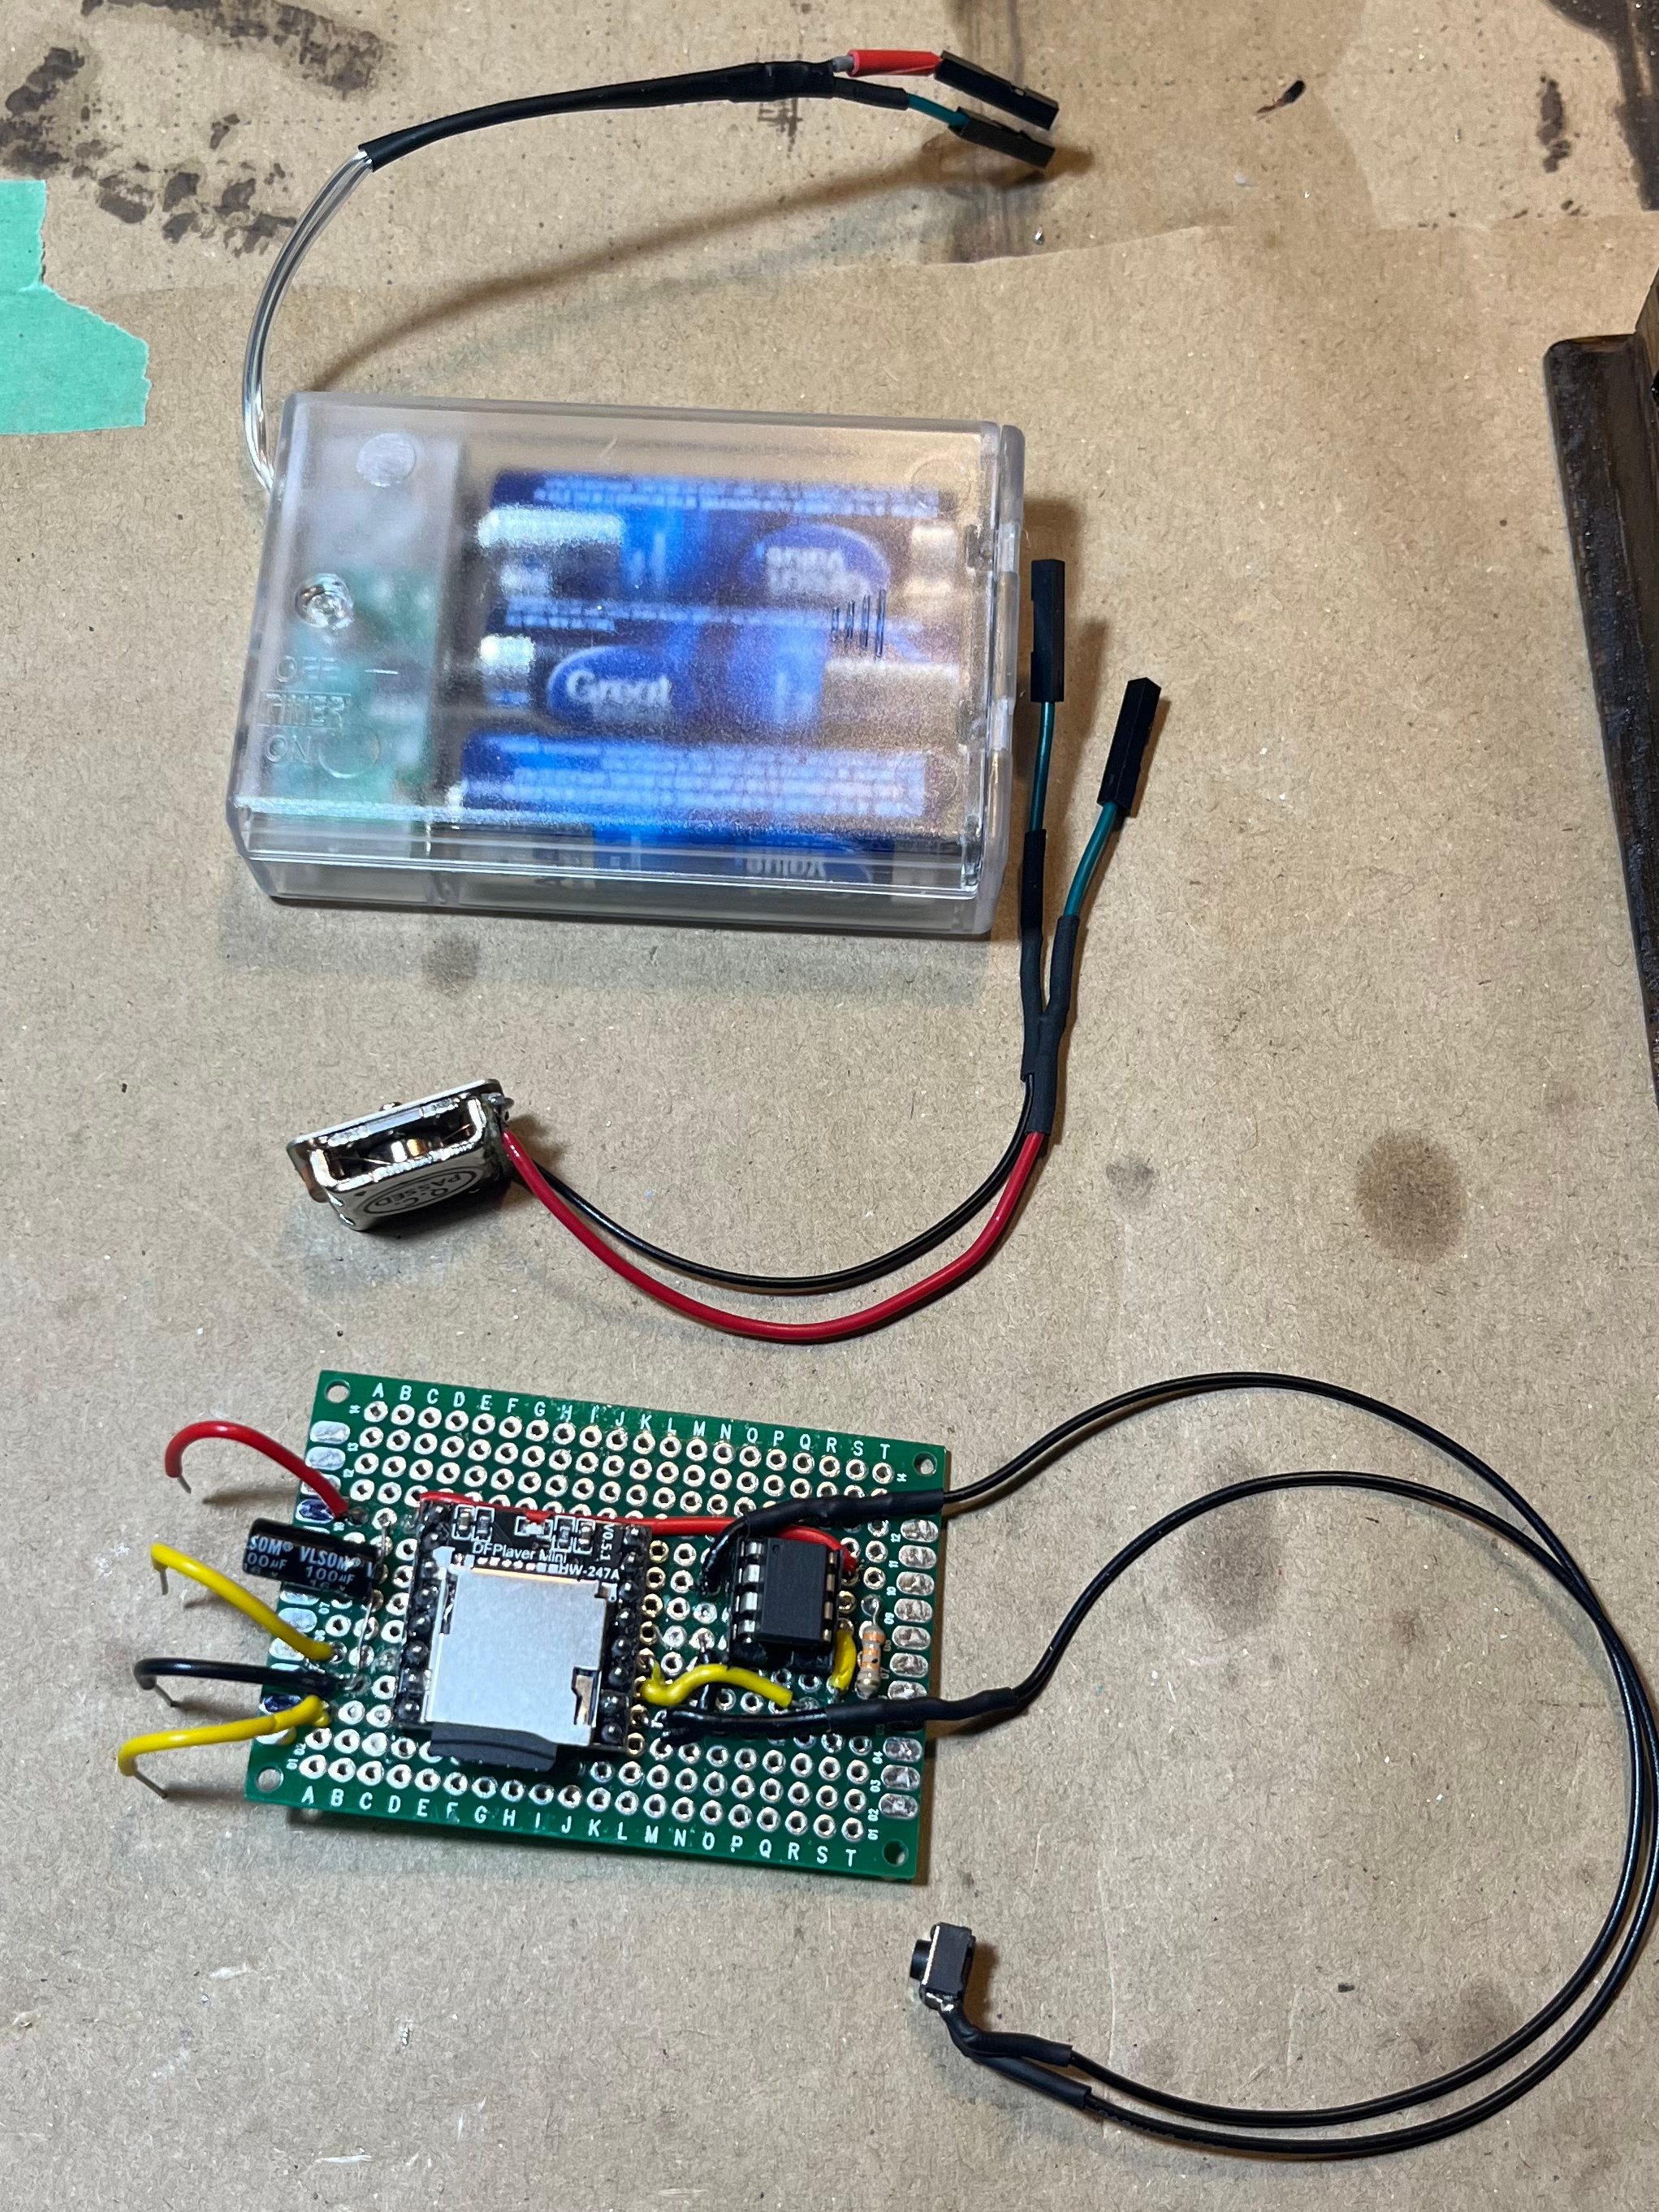
The solution came down to two components:
- A bone conduction transducer
- The DFPlayer Mini
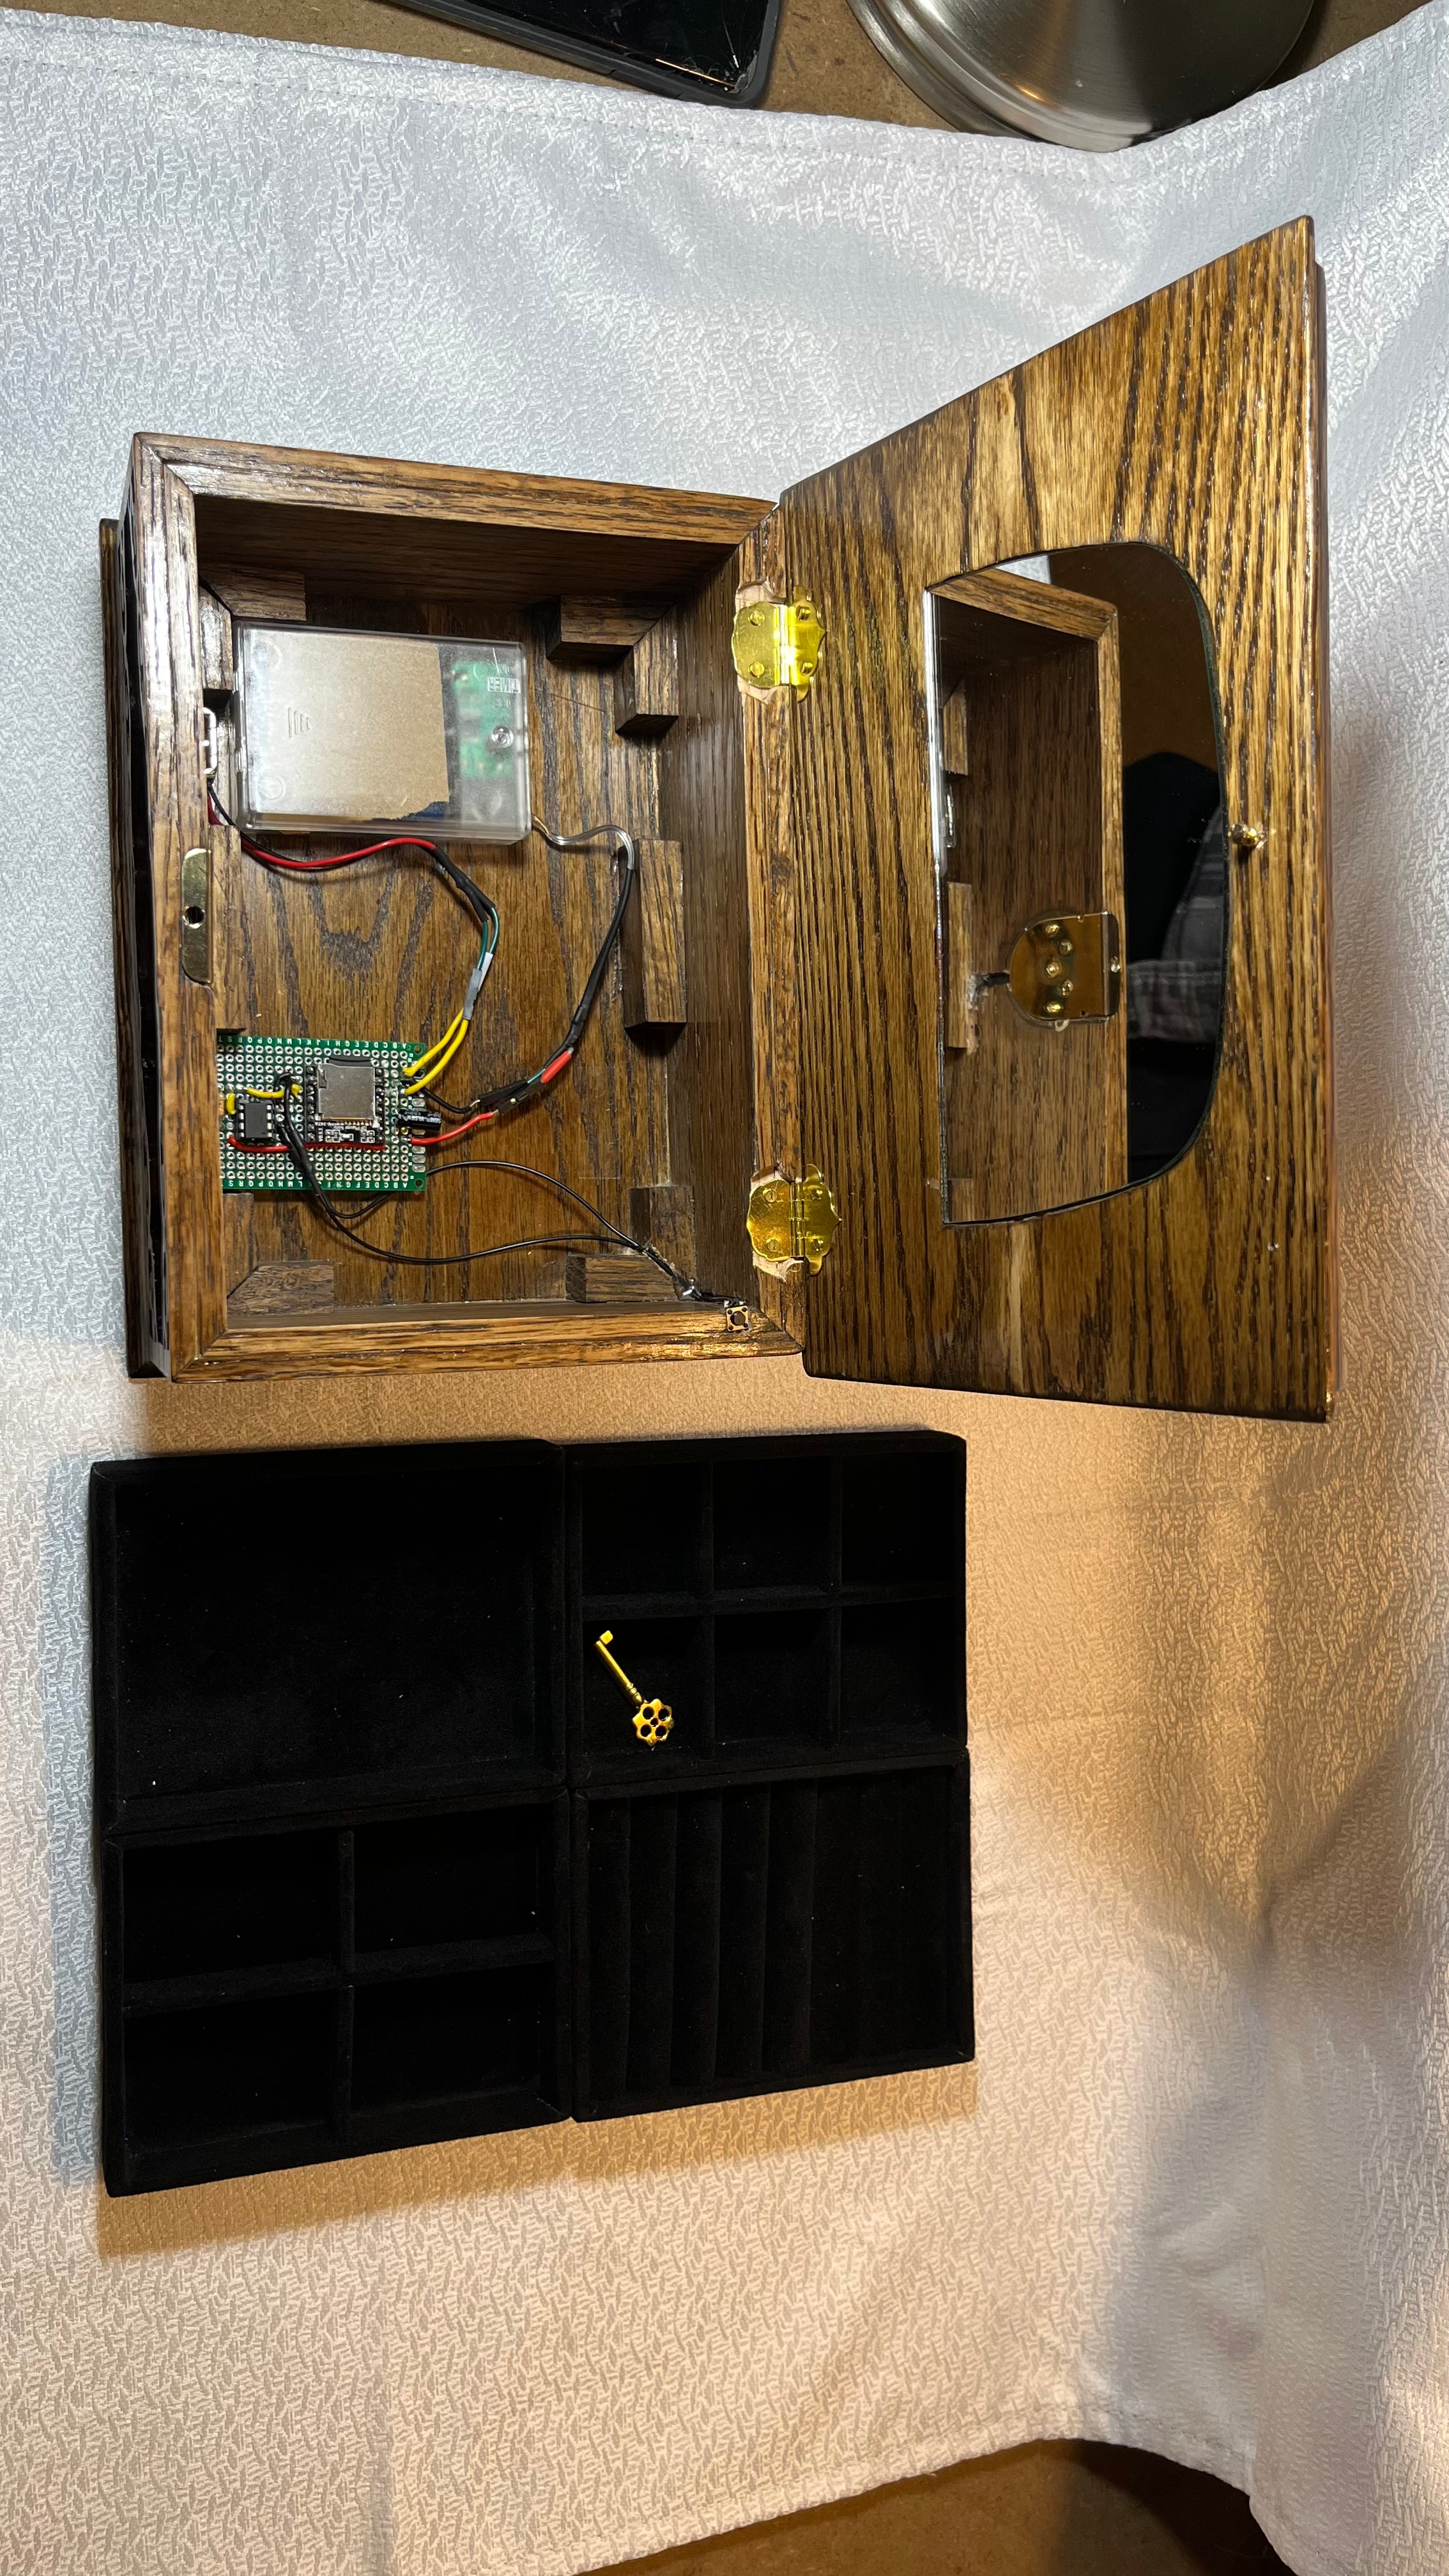
Instead of projecting sound outward, the transducer drives the wood itself. The entire box becomes the speaker, which gives it that soft, embedded “music box” quality rather than sounding like electronics hidden inside.
The DFPlayer handles playback from an SD card, and includes a small onboard amp. It’s also cheap enough that blowing one up during testing isn’t a disaster.
On paper, it solved everything. In practice, it took some work.
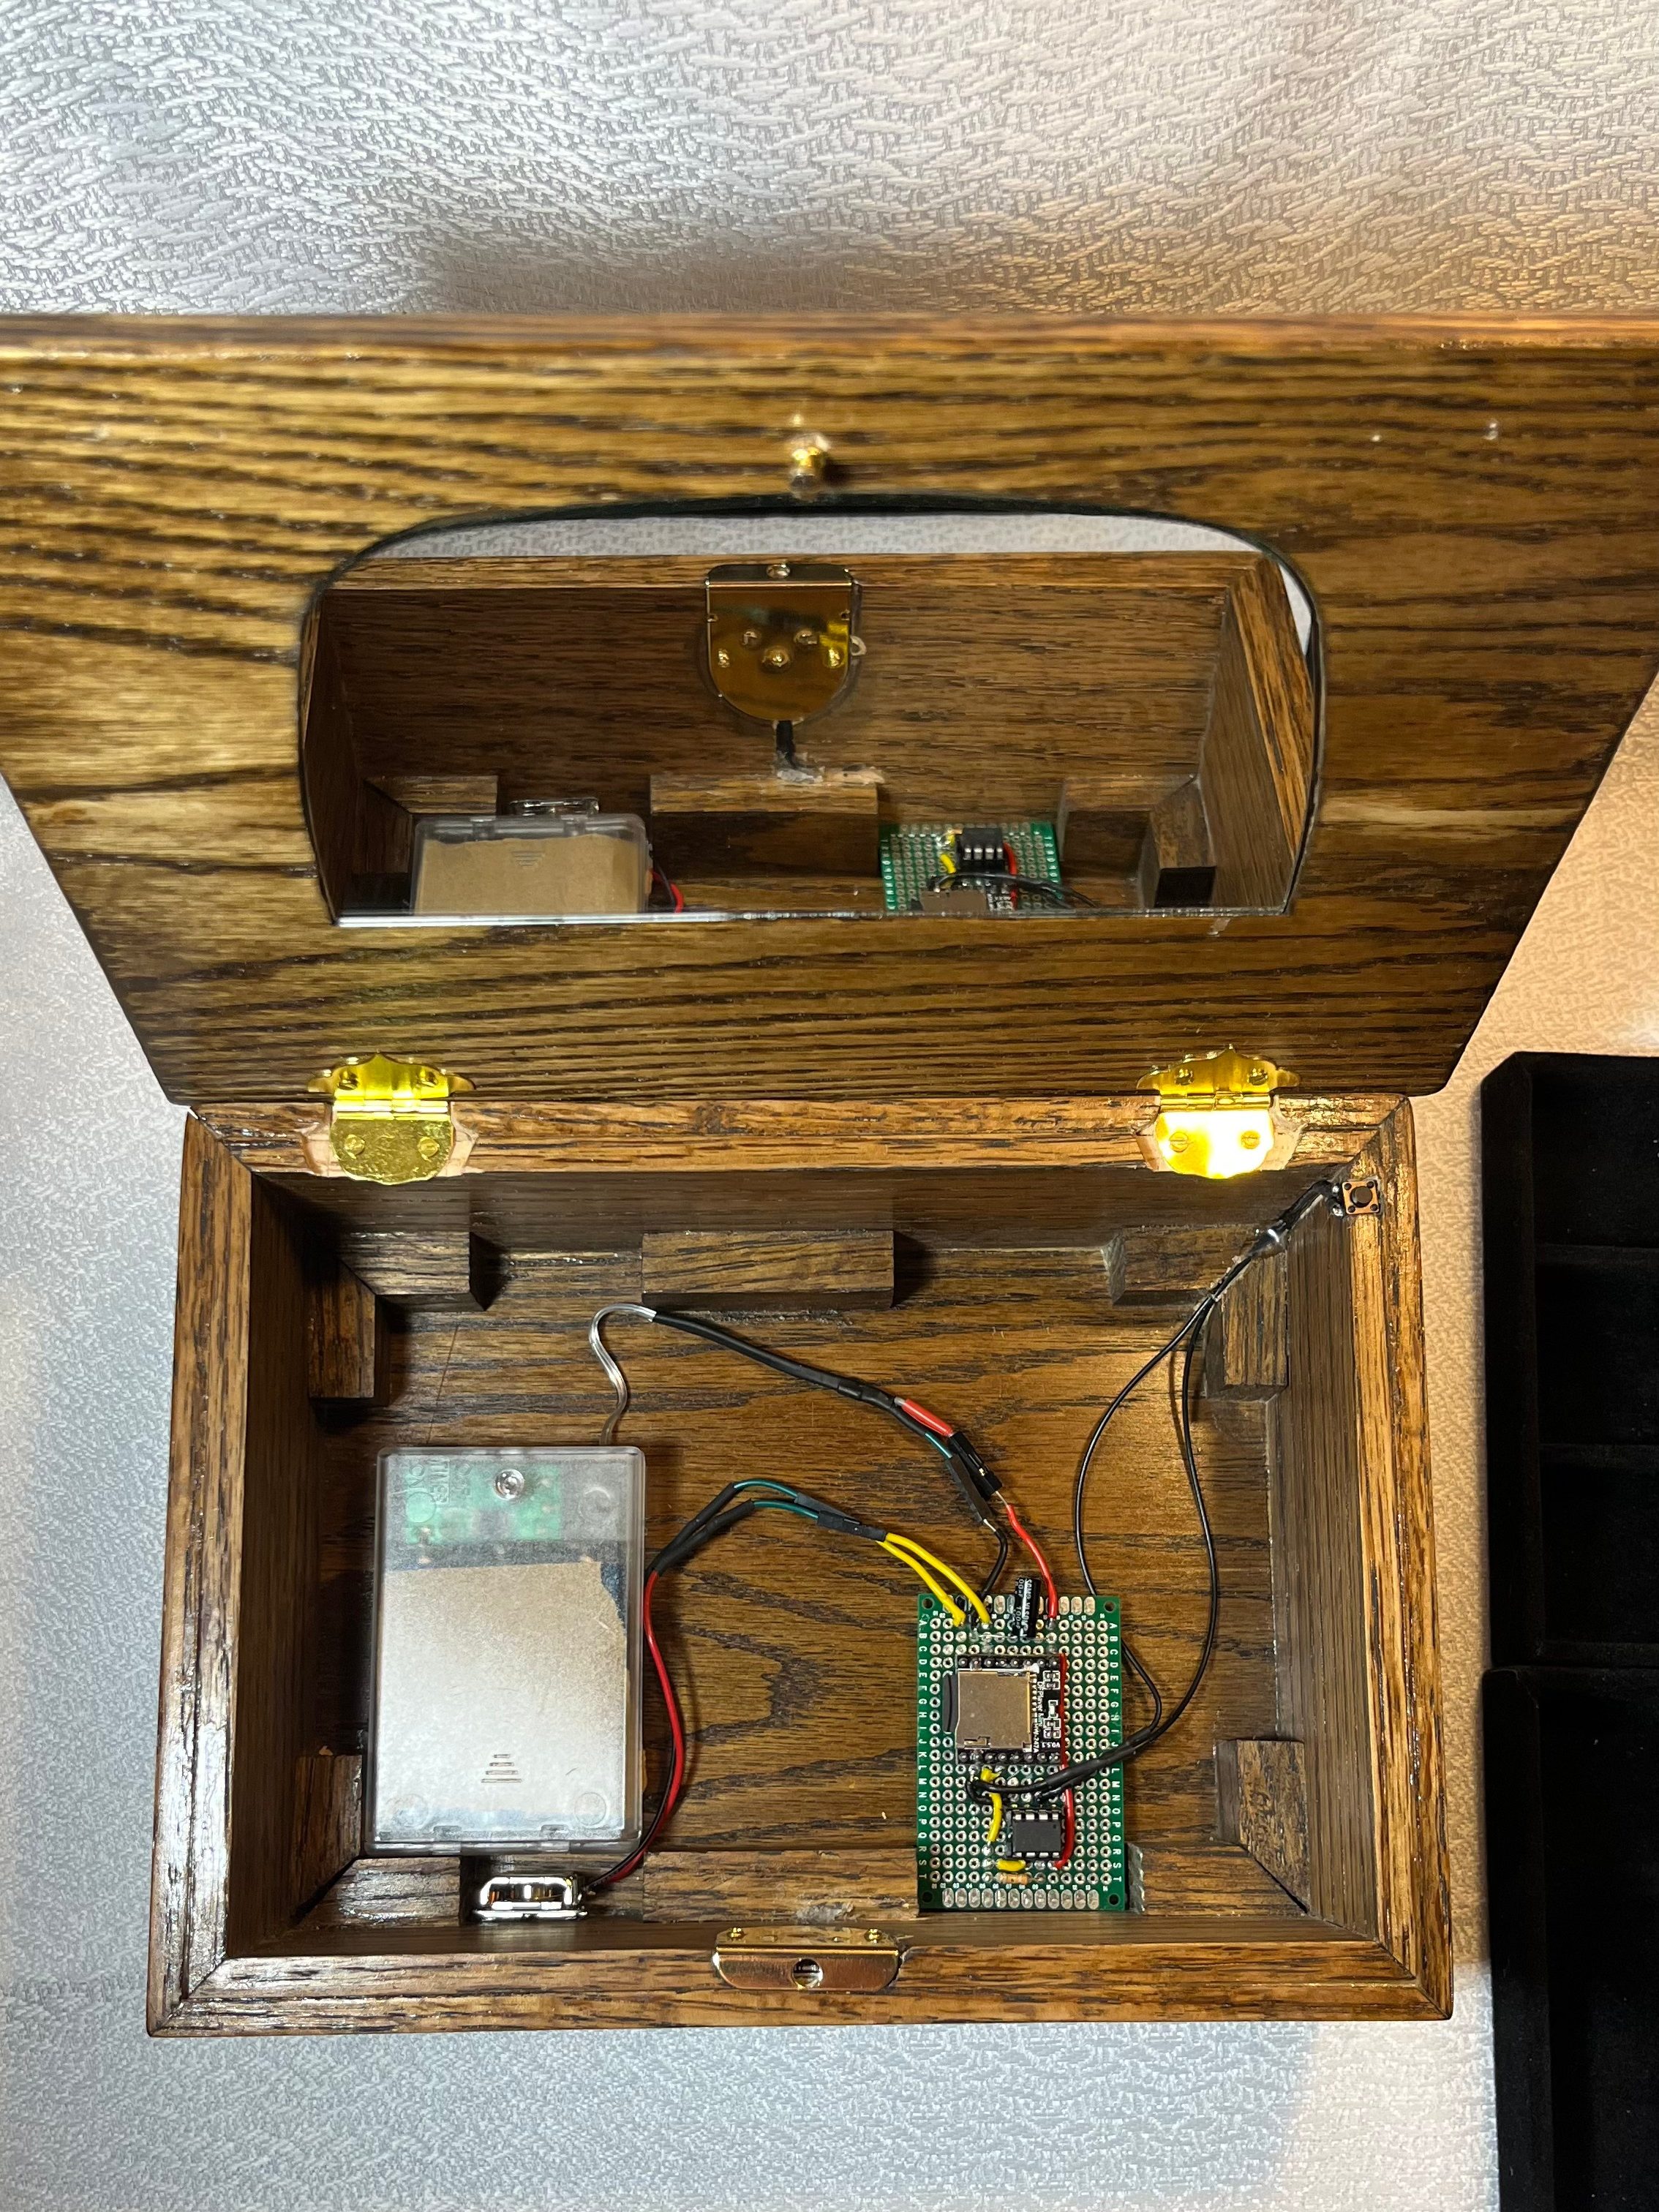
Electronics (Where Things Got Messy)
The DFPlayer has a few control options, none of them quite right for this use case.
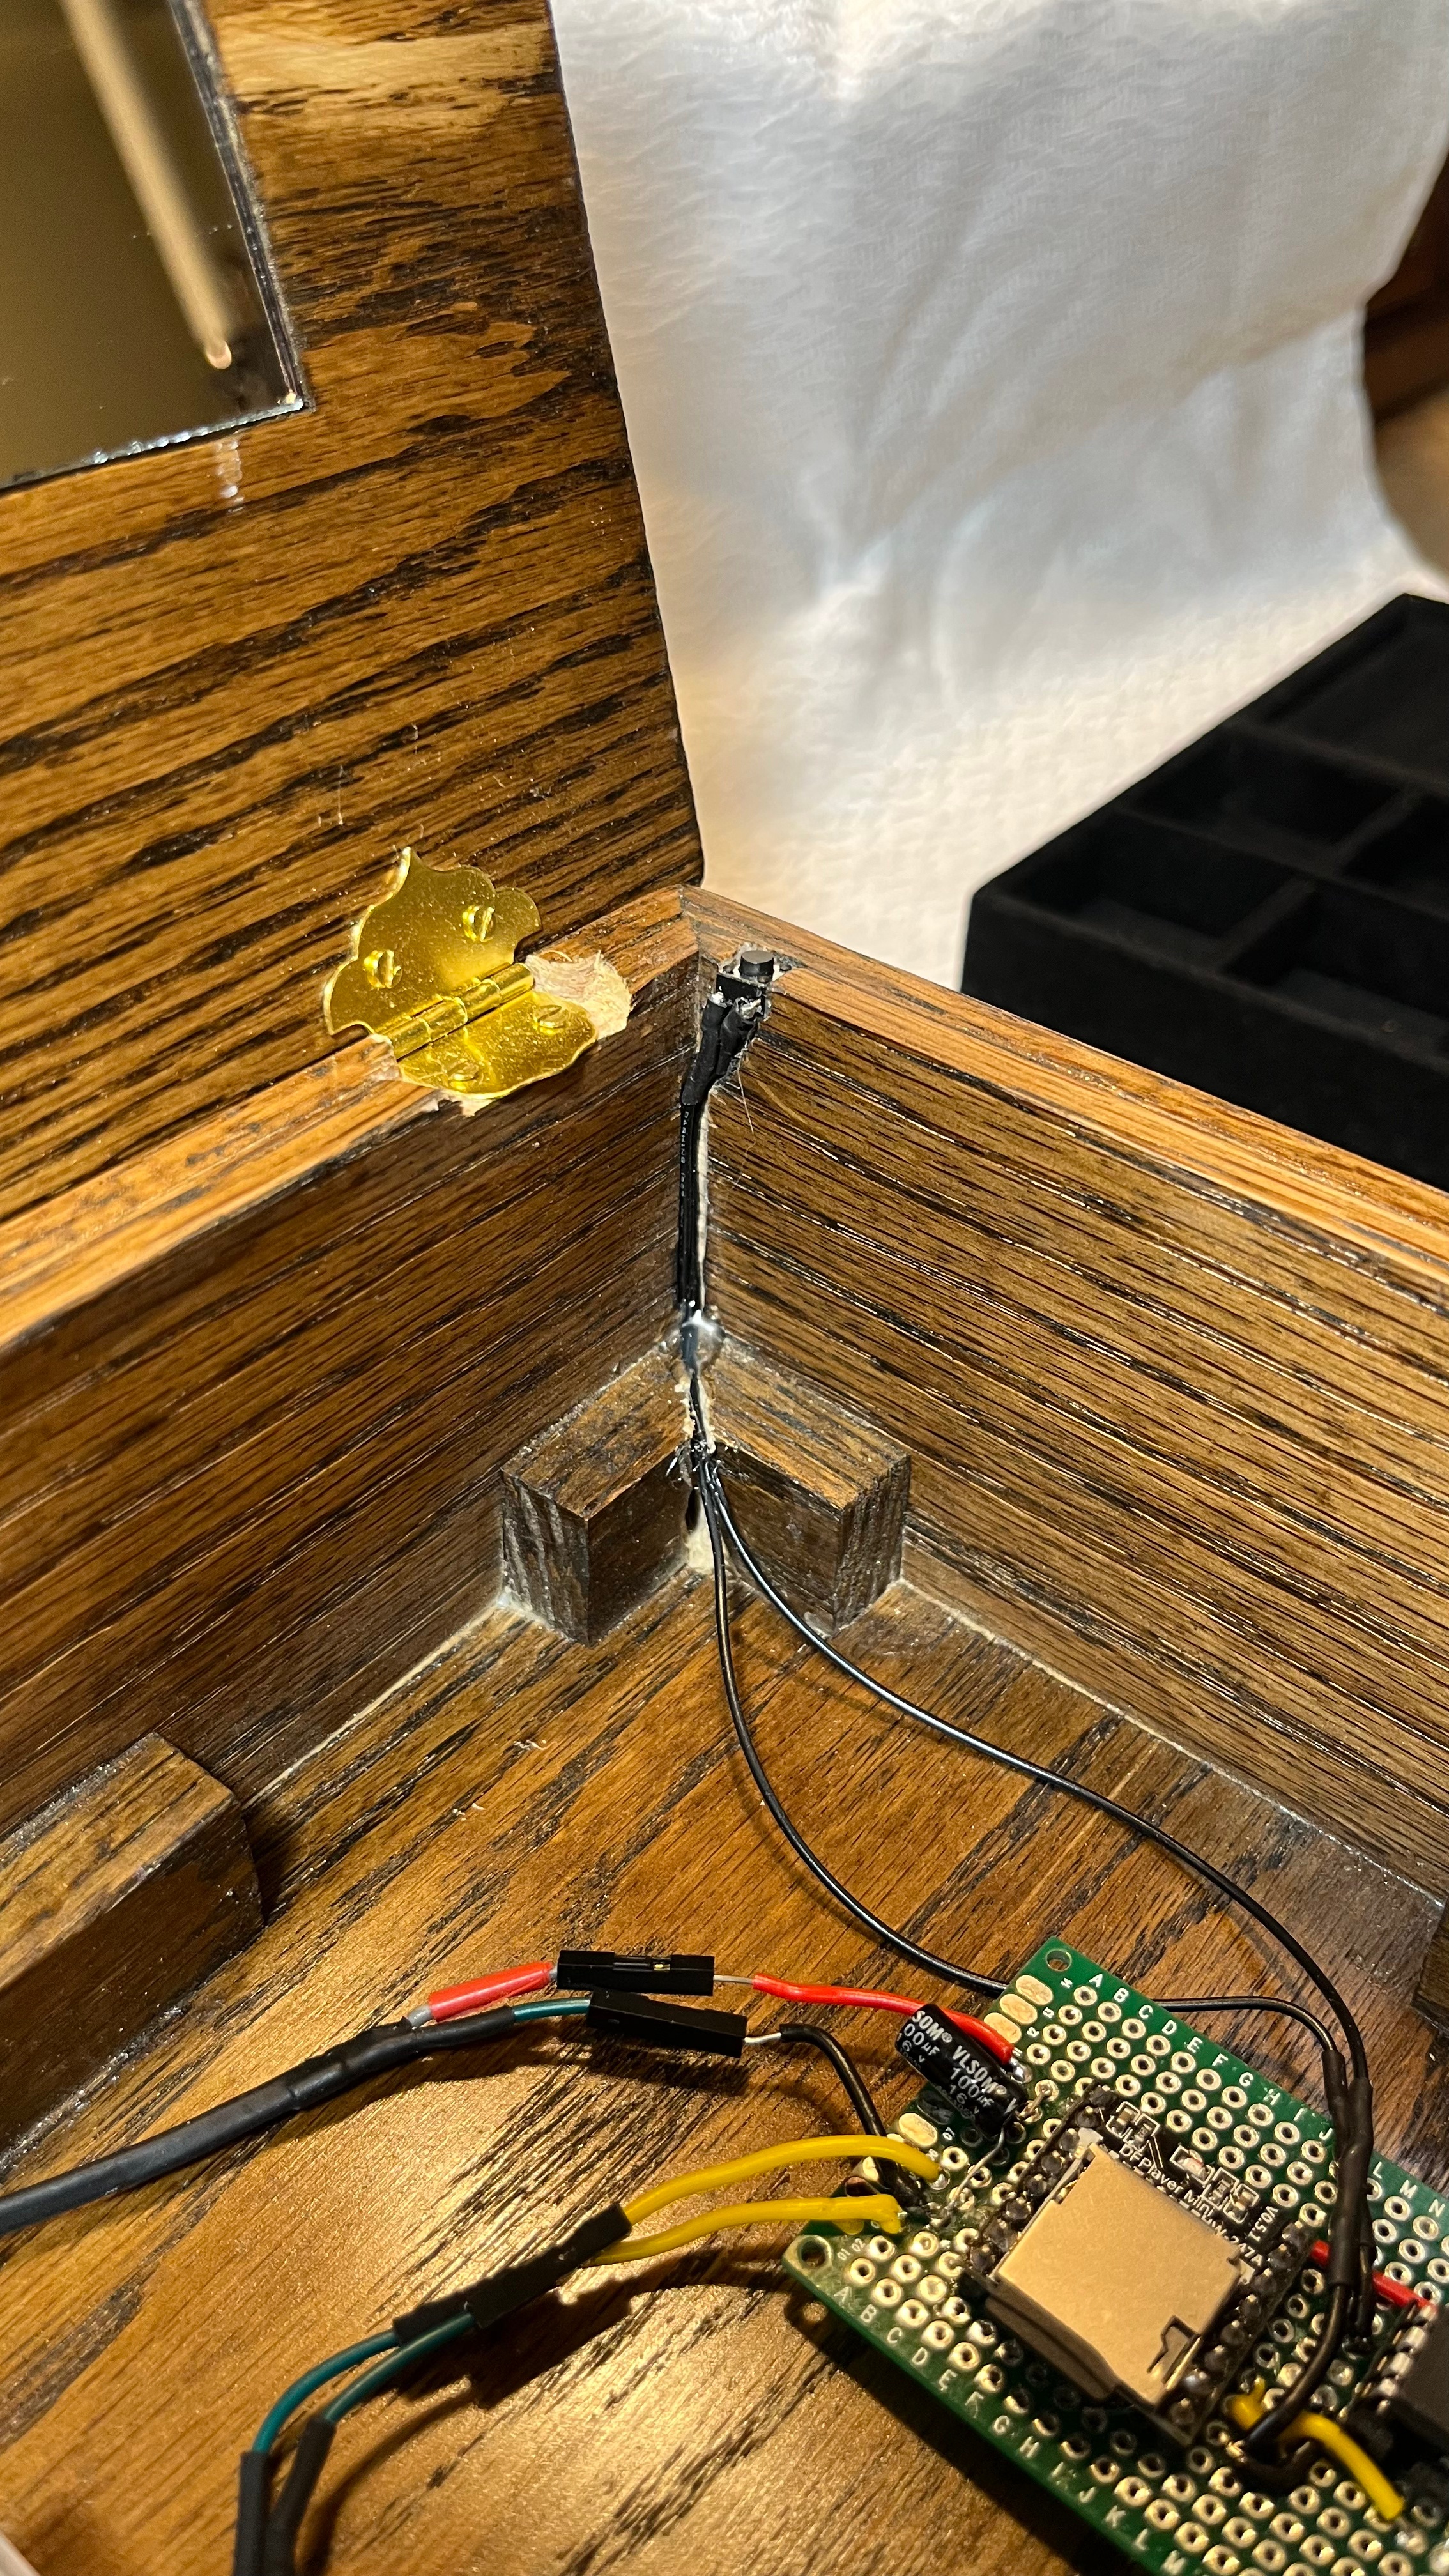
There’s no native “play/stop on lid open/close” behaviour, so I used an ATtiny85 to interpret the lid switch and send commands.
My first approach was serial communication. It should have worked, but in reality it was inconsistent—commands would randomly fail, and debugging it turned into a time sink.
The workaround ended up being better anyway.
The DFPlayer supports a resistor-based input method, where different resistance values correspond to different commands. It’s crude, but extremely reliable.
So instead of serial, I used the ATtiny to briefly pull a pin low through specific resistors depending on whether the lid was opening or closing. After tuning debounce timing and pulse lengths, it became rock solid.
Now, when the lid opens, the music starts. When it closes, it stops. Perfection!
From CAD to Carpentry
I usually wing my woodworking projects. This one needed more planning.
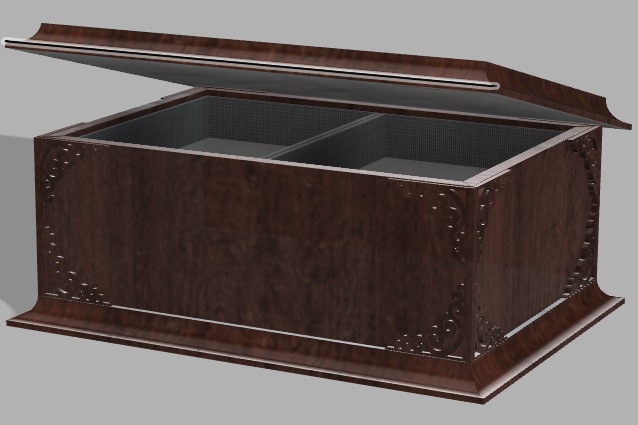
Between the electronics, the internal trays, and limited shop time, guessing my way through it would’ve been risky. So I built a full model in Fusion 360—something I hadn’t seriously touched in over a decade.
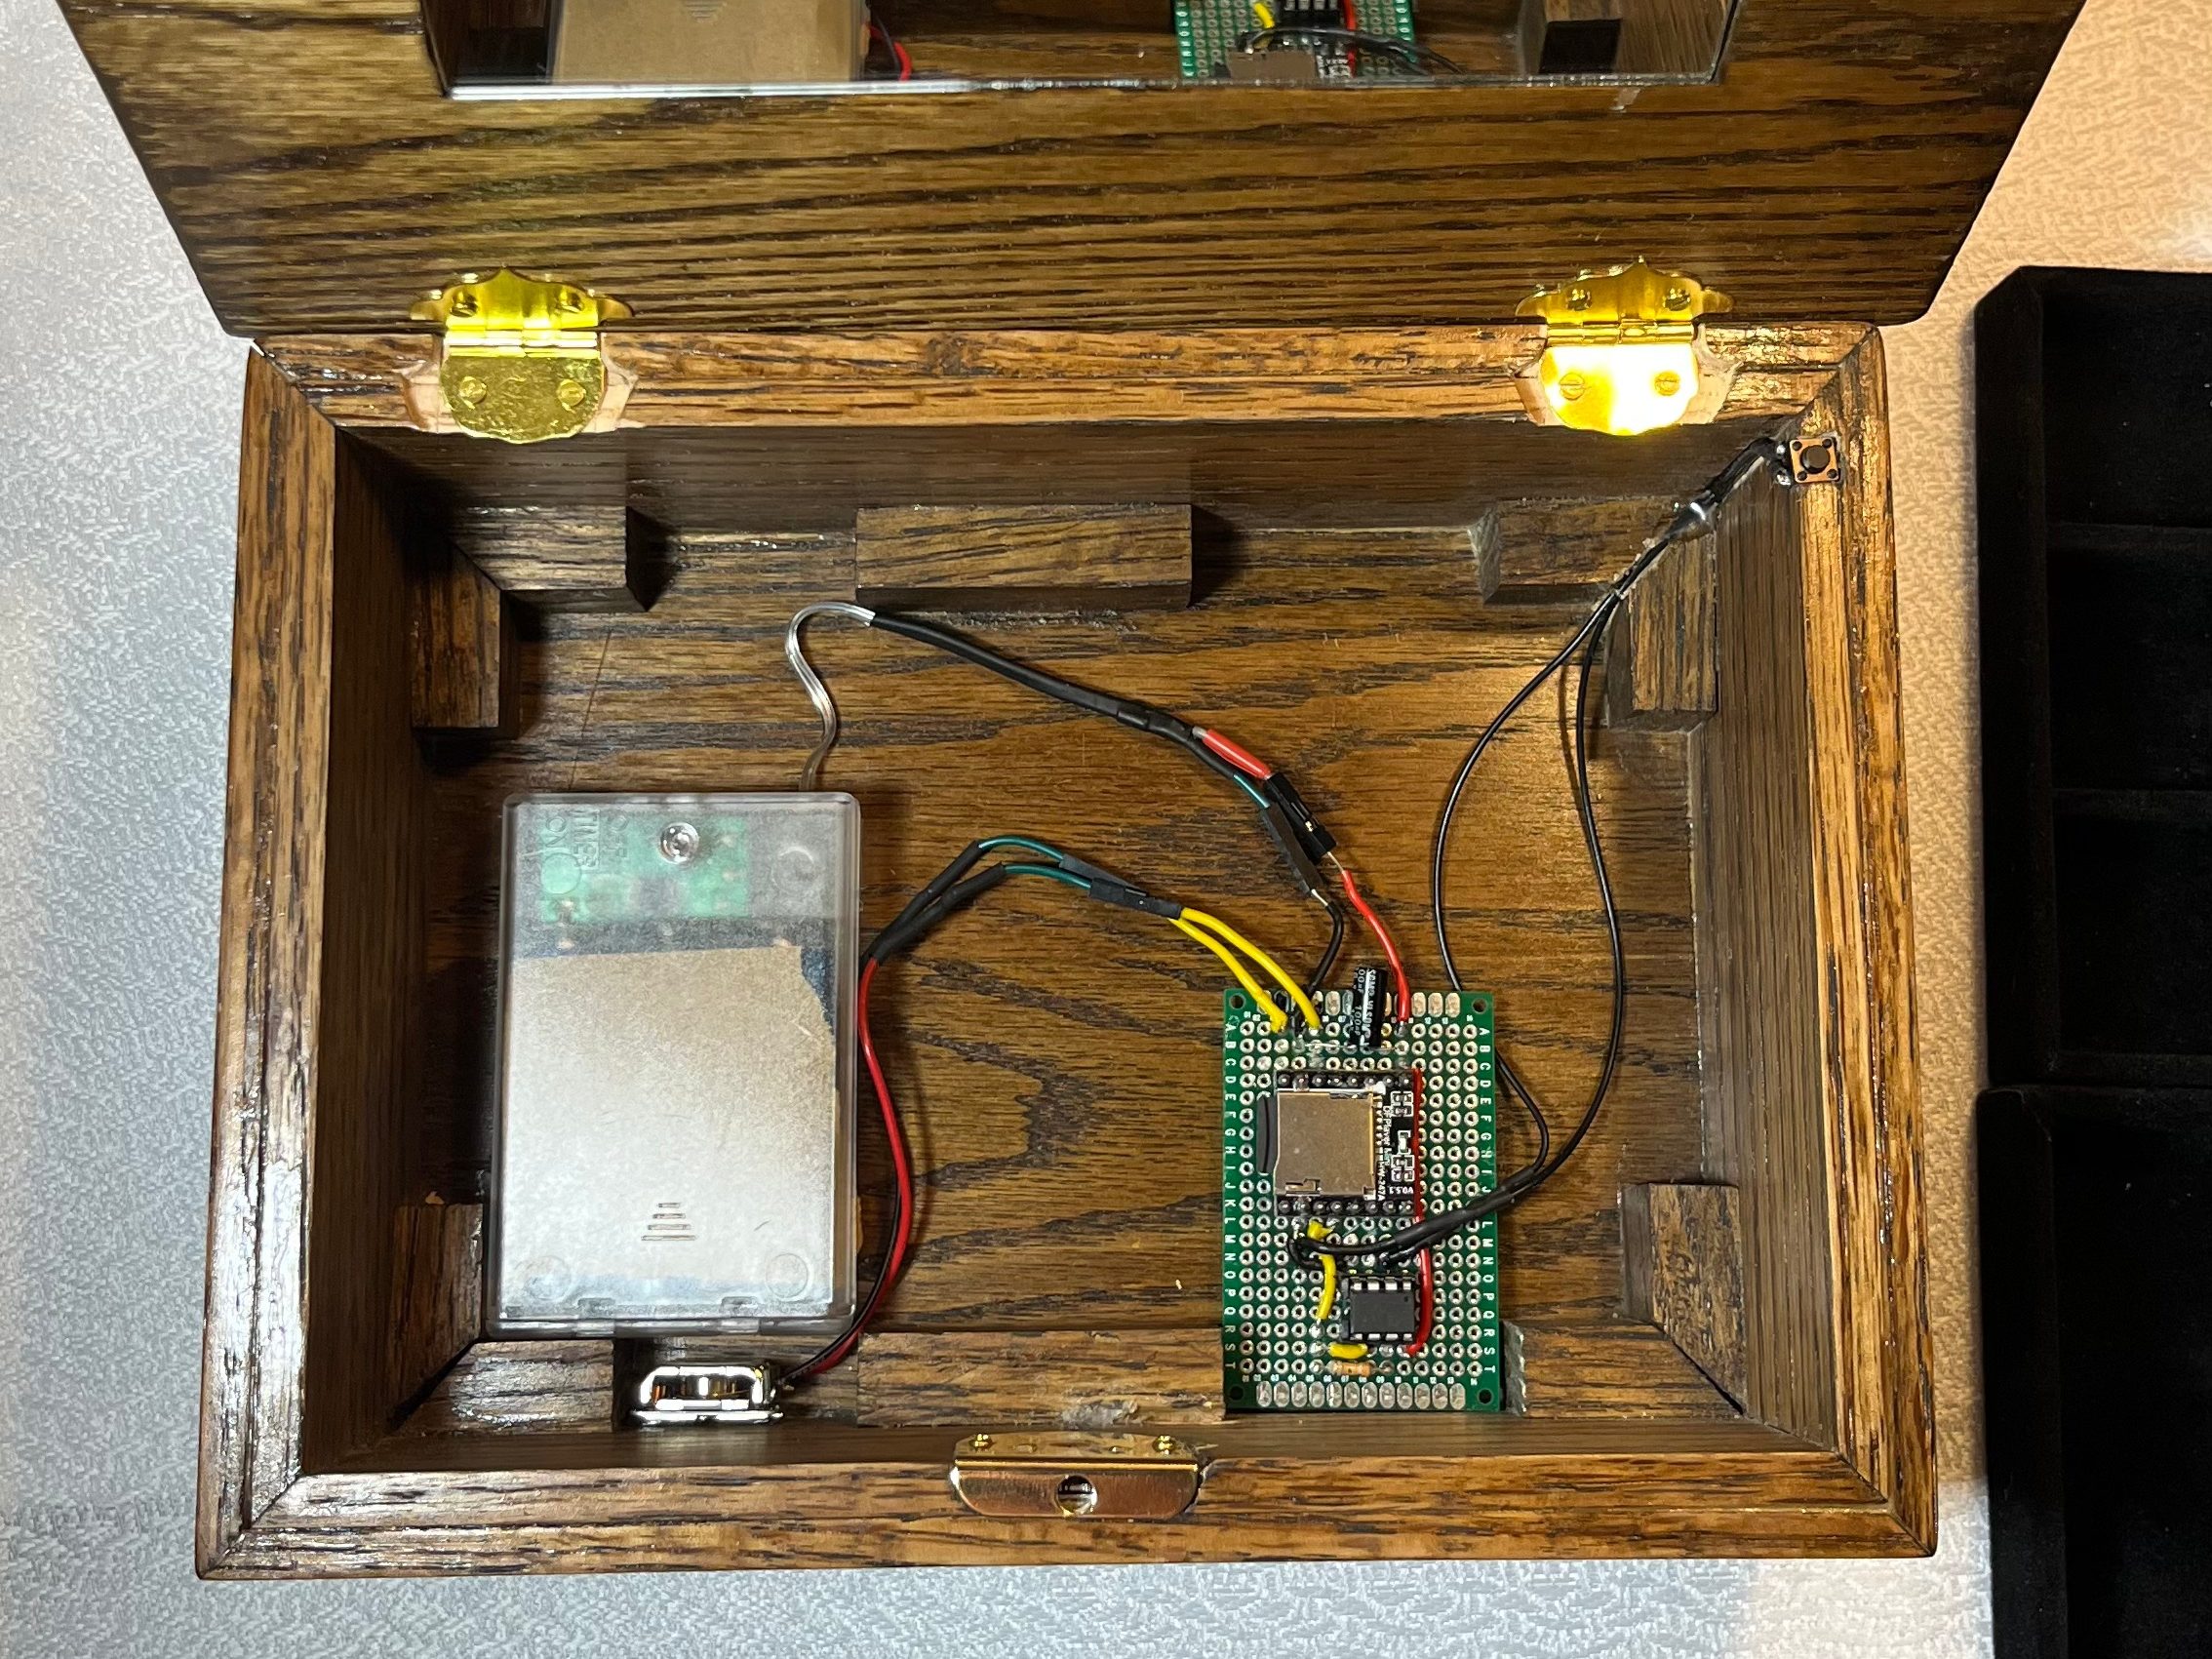
I started by modelling the jewellery tray inserts (which I had physically), then built the box around them with proper tolerances. From there, I generated templates for the scrollwork and overall structure.
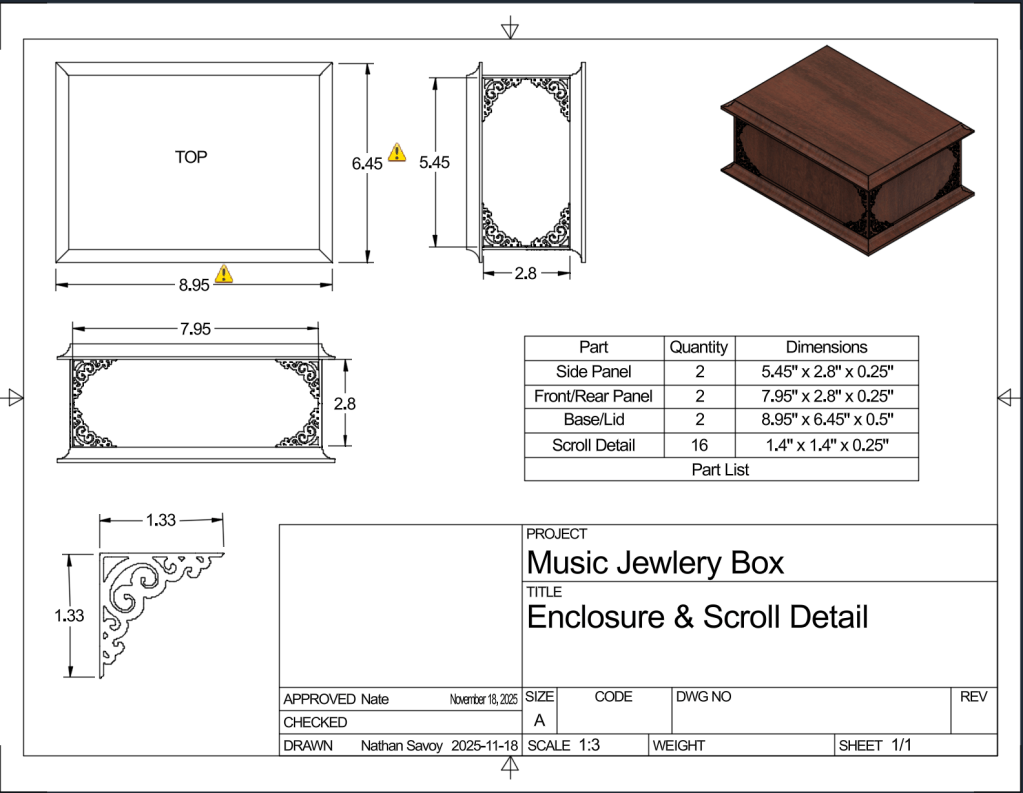
Material wise:
- 1/4″ oak for the sides and scrollwork
- 1/2″ oak for the lid and base
Having the model upfront saved a lot of second-guessing once I was in the shop.
The Sound
For the music, I used one of my own songs—Wild Roses—and recreated the melody in Ableton Live and dialed in a realistic music box timbre a VST.
Once this was loaded onto the SD card, the transducer does the rest. Because the sound is driven through the wood itself, it lands much closer to a real music box than a speaker ever would.
It doesn’t just play from the box – it feels like it’s coming out of it.
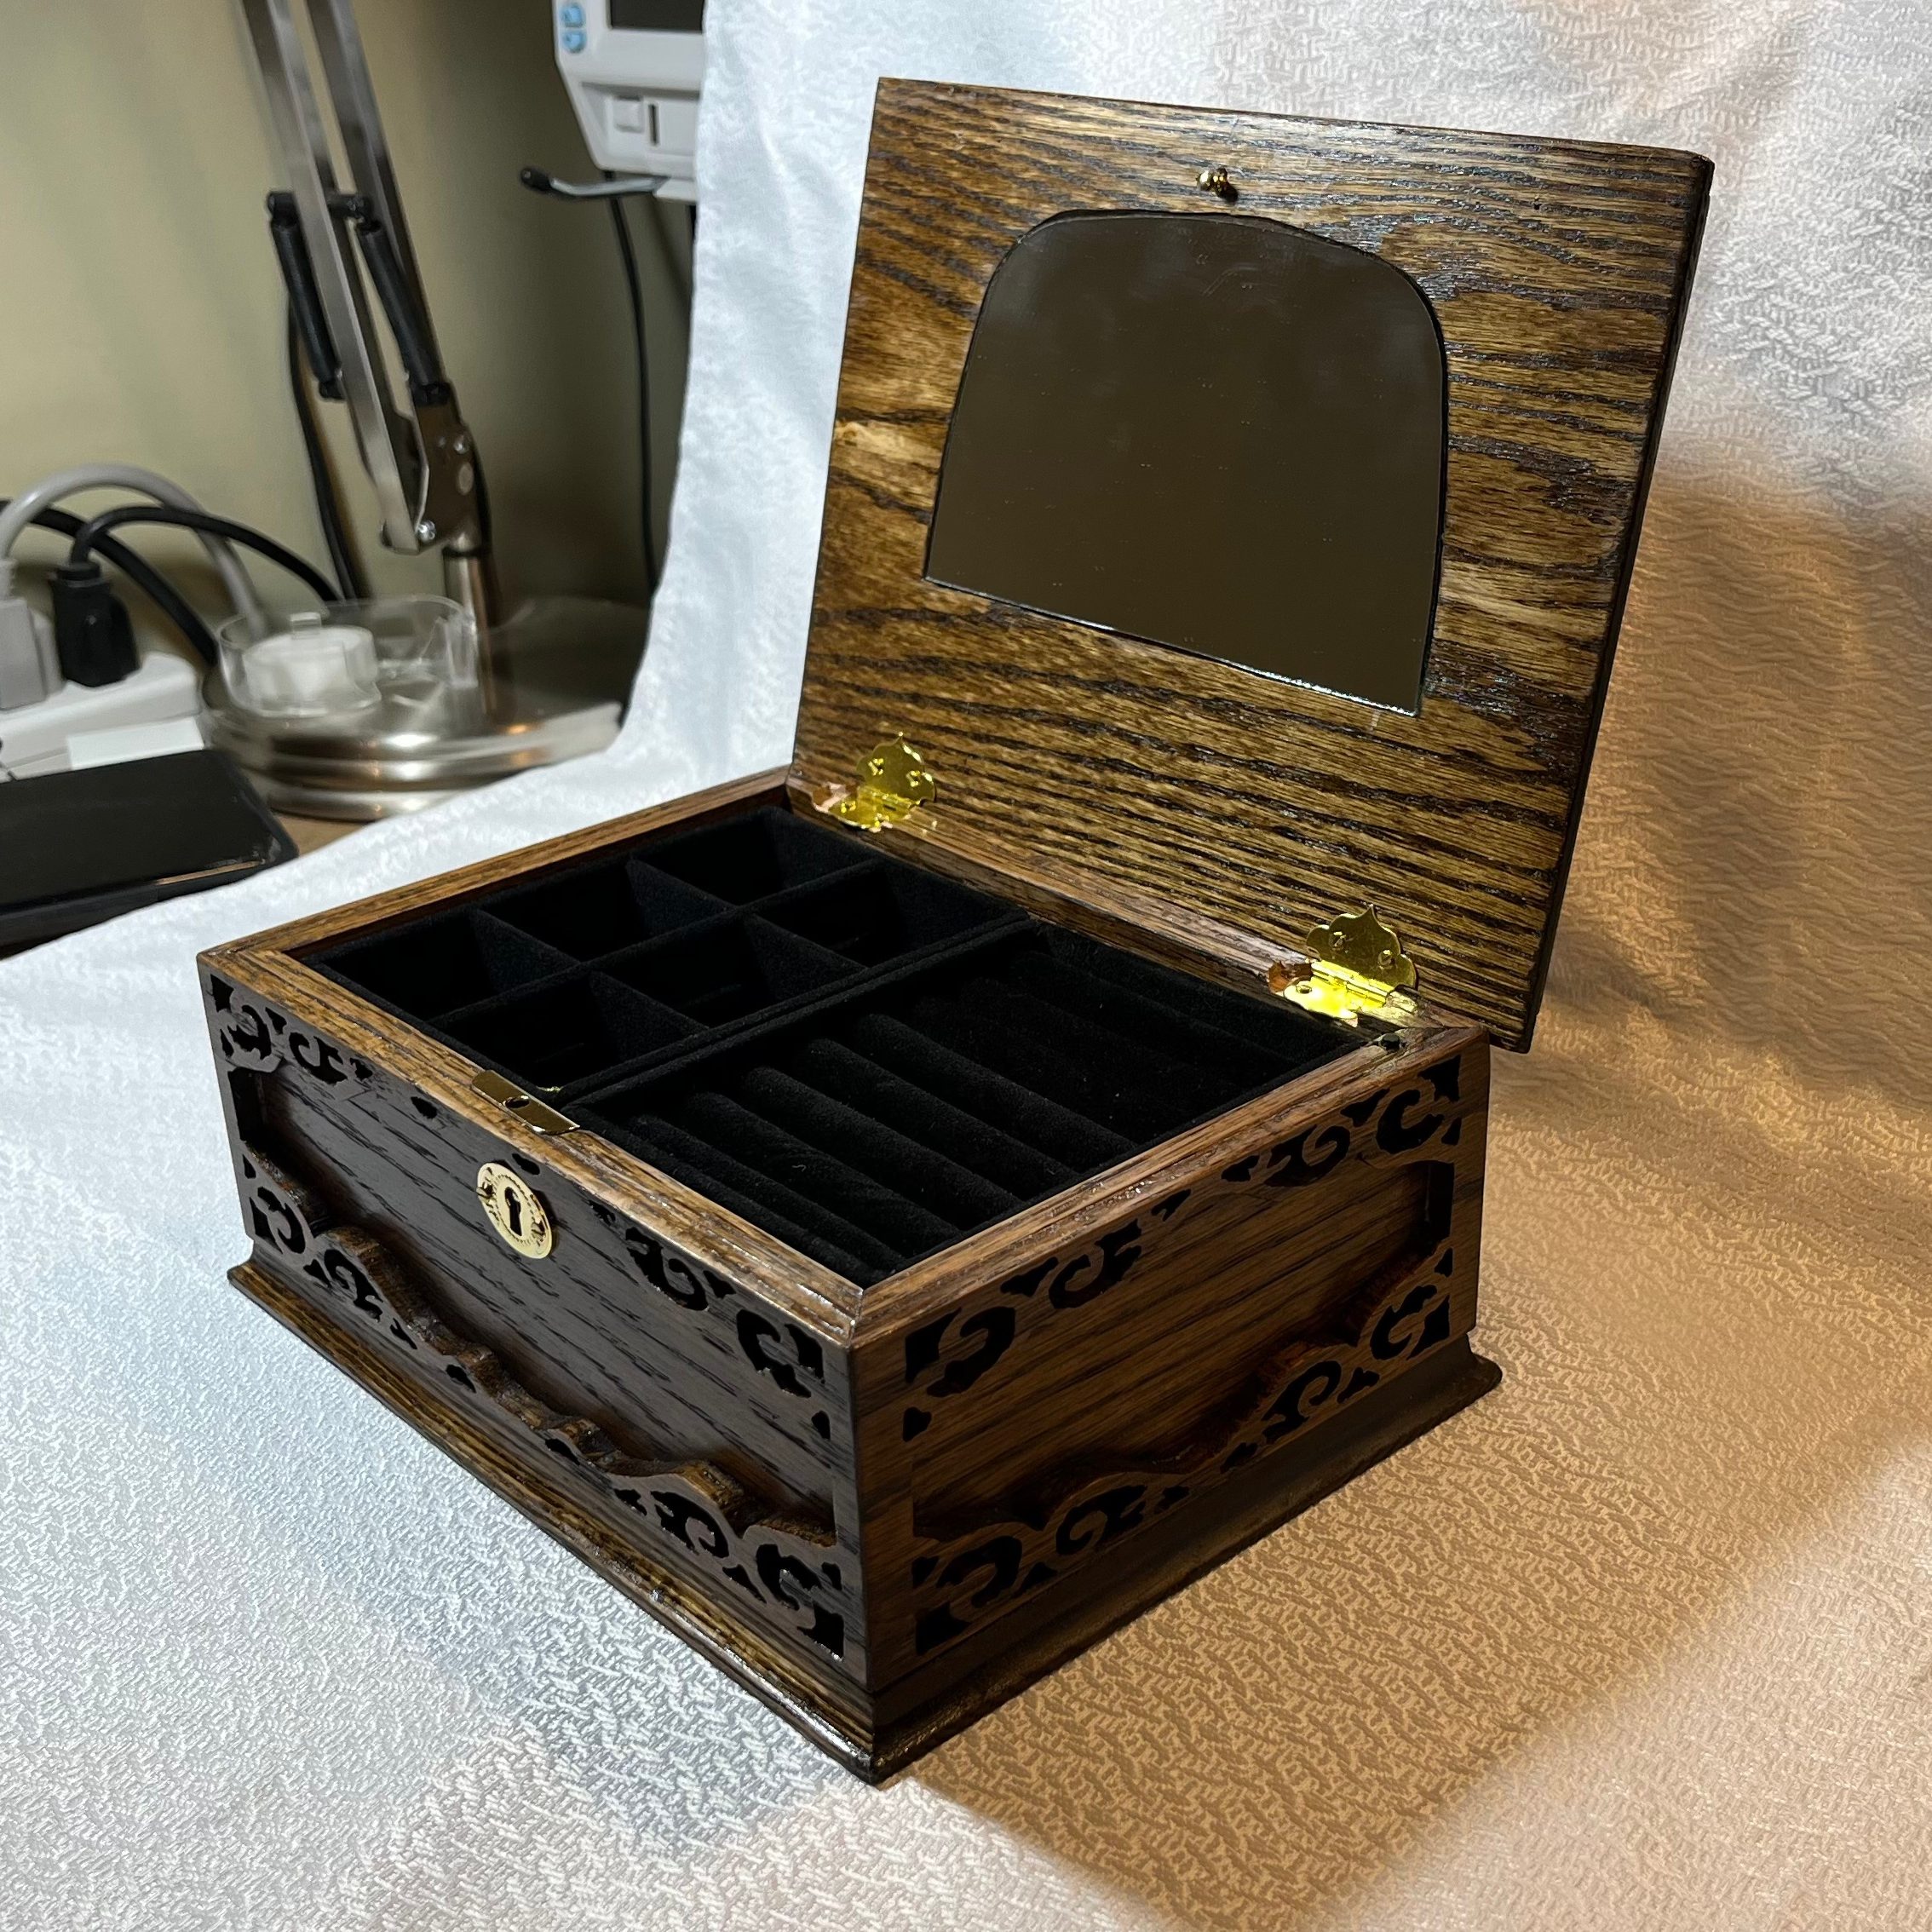
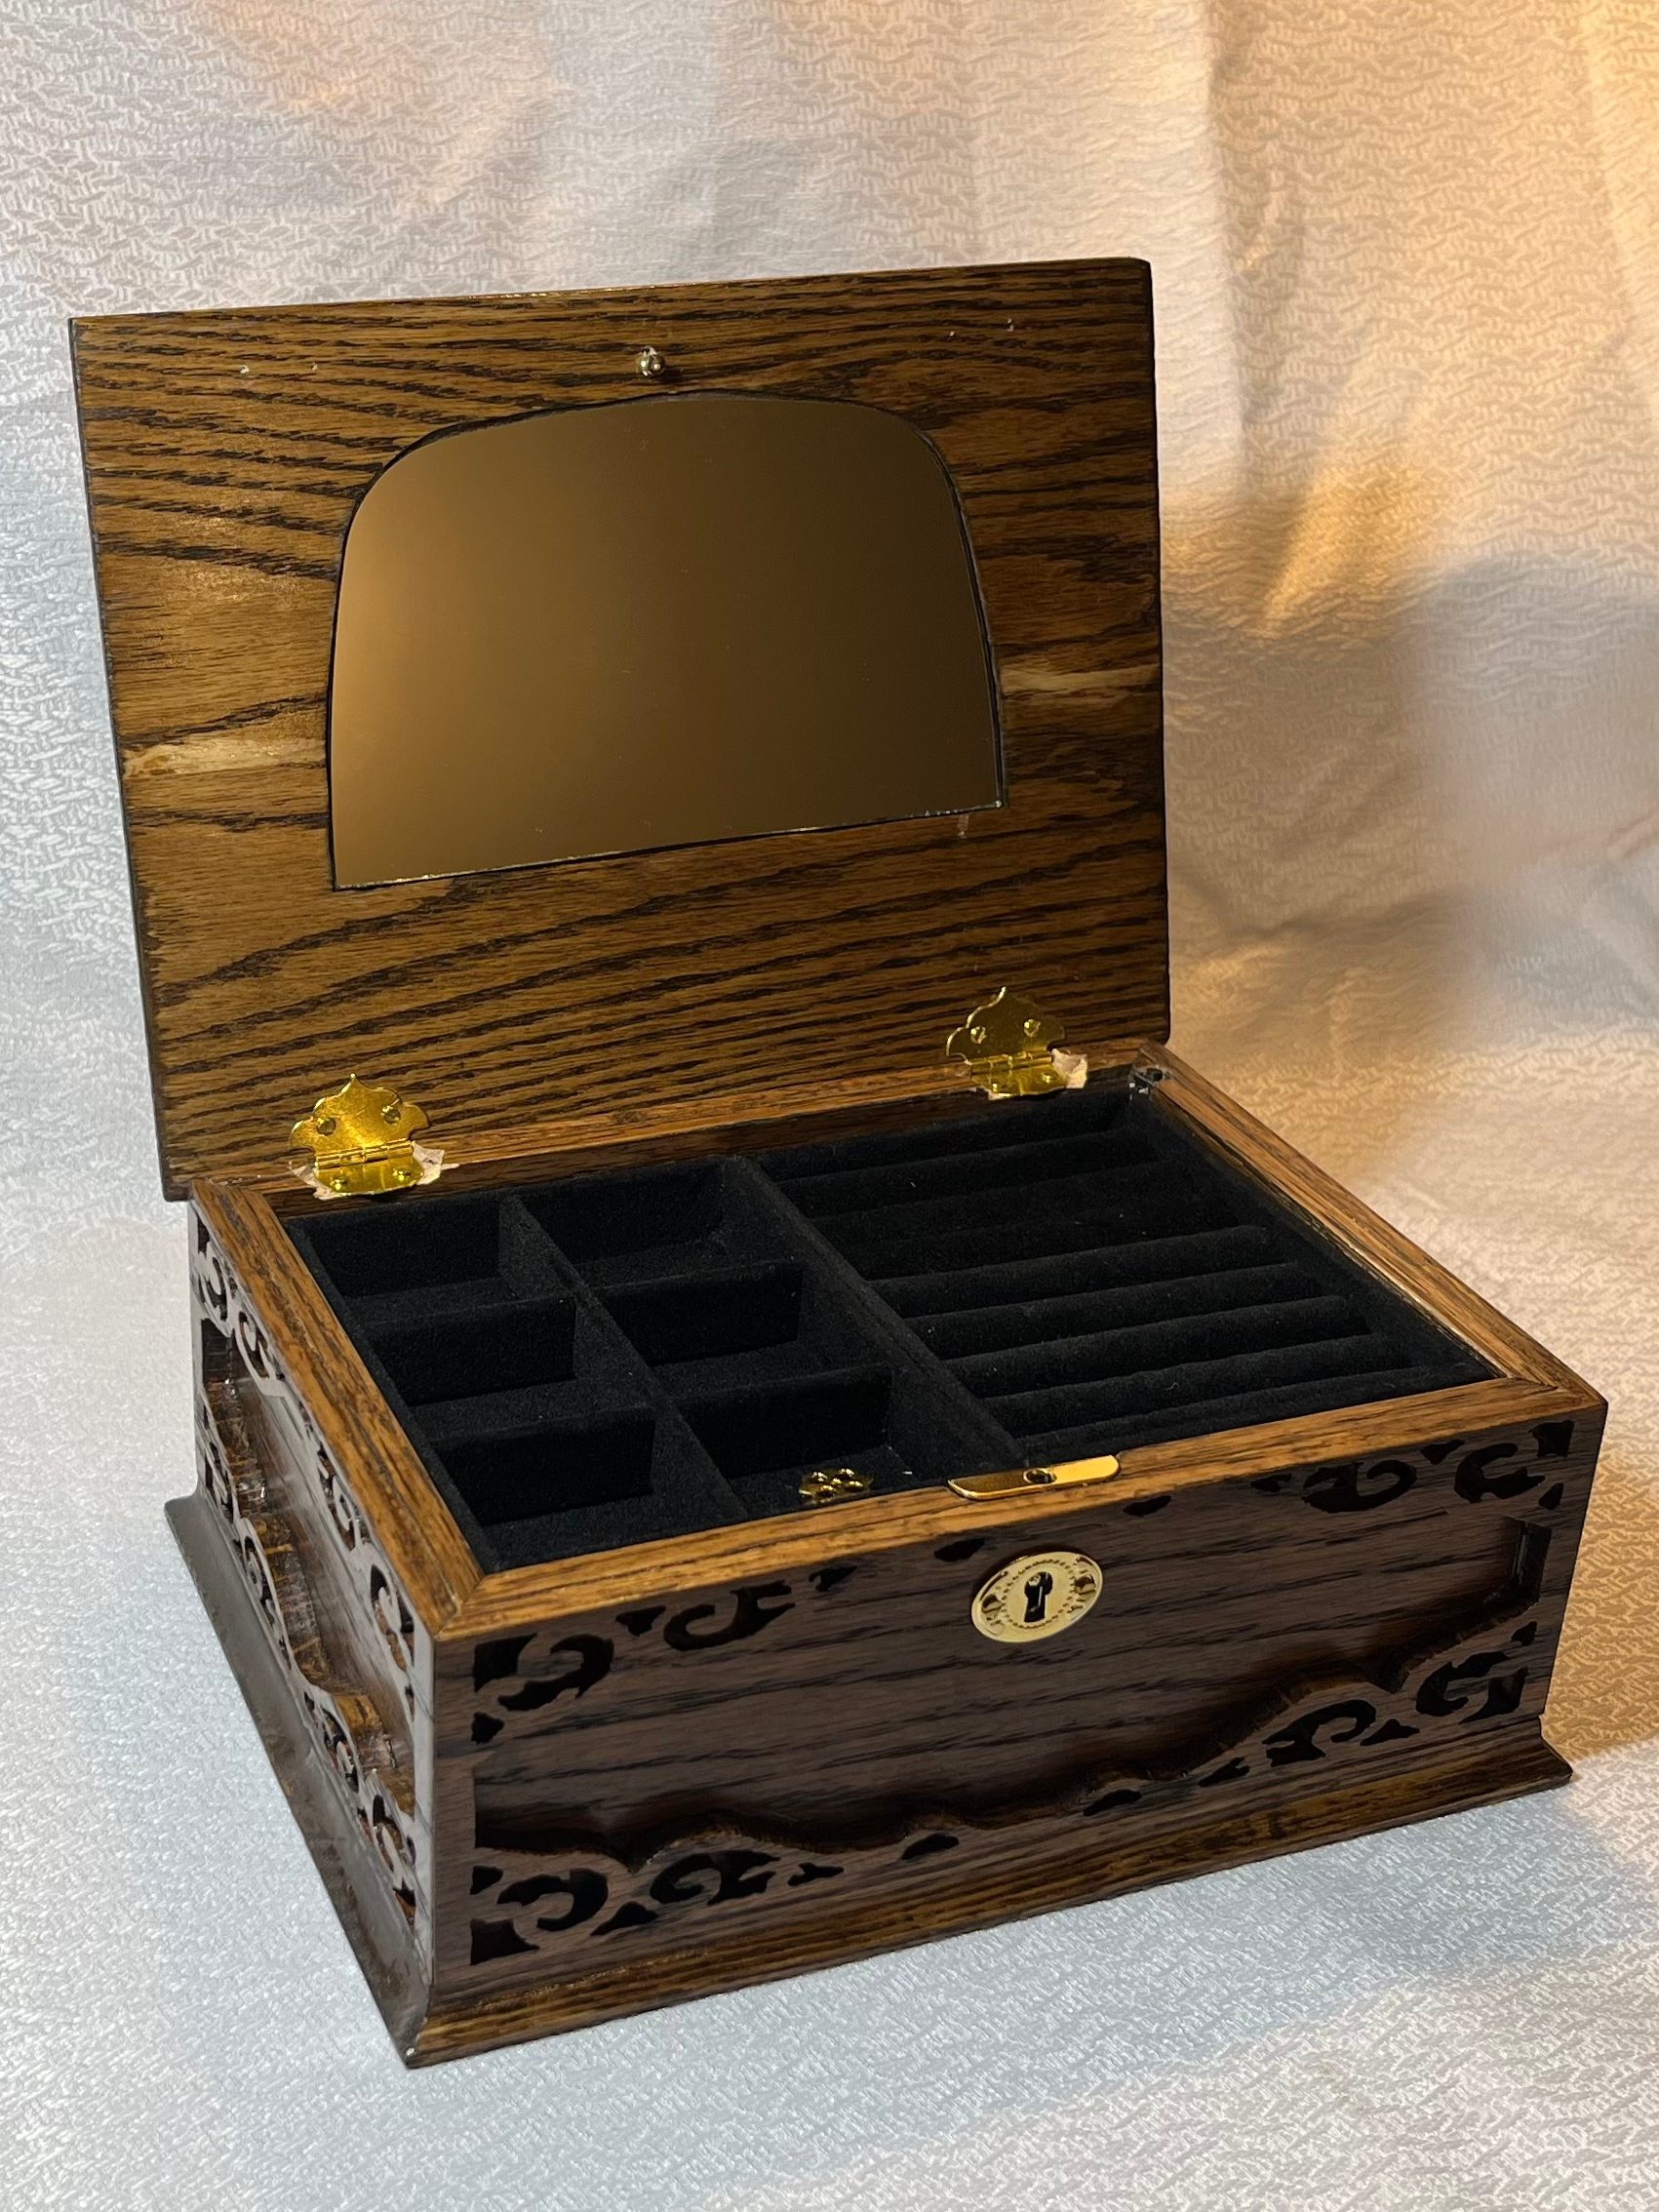
Finishing
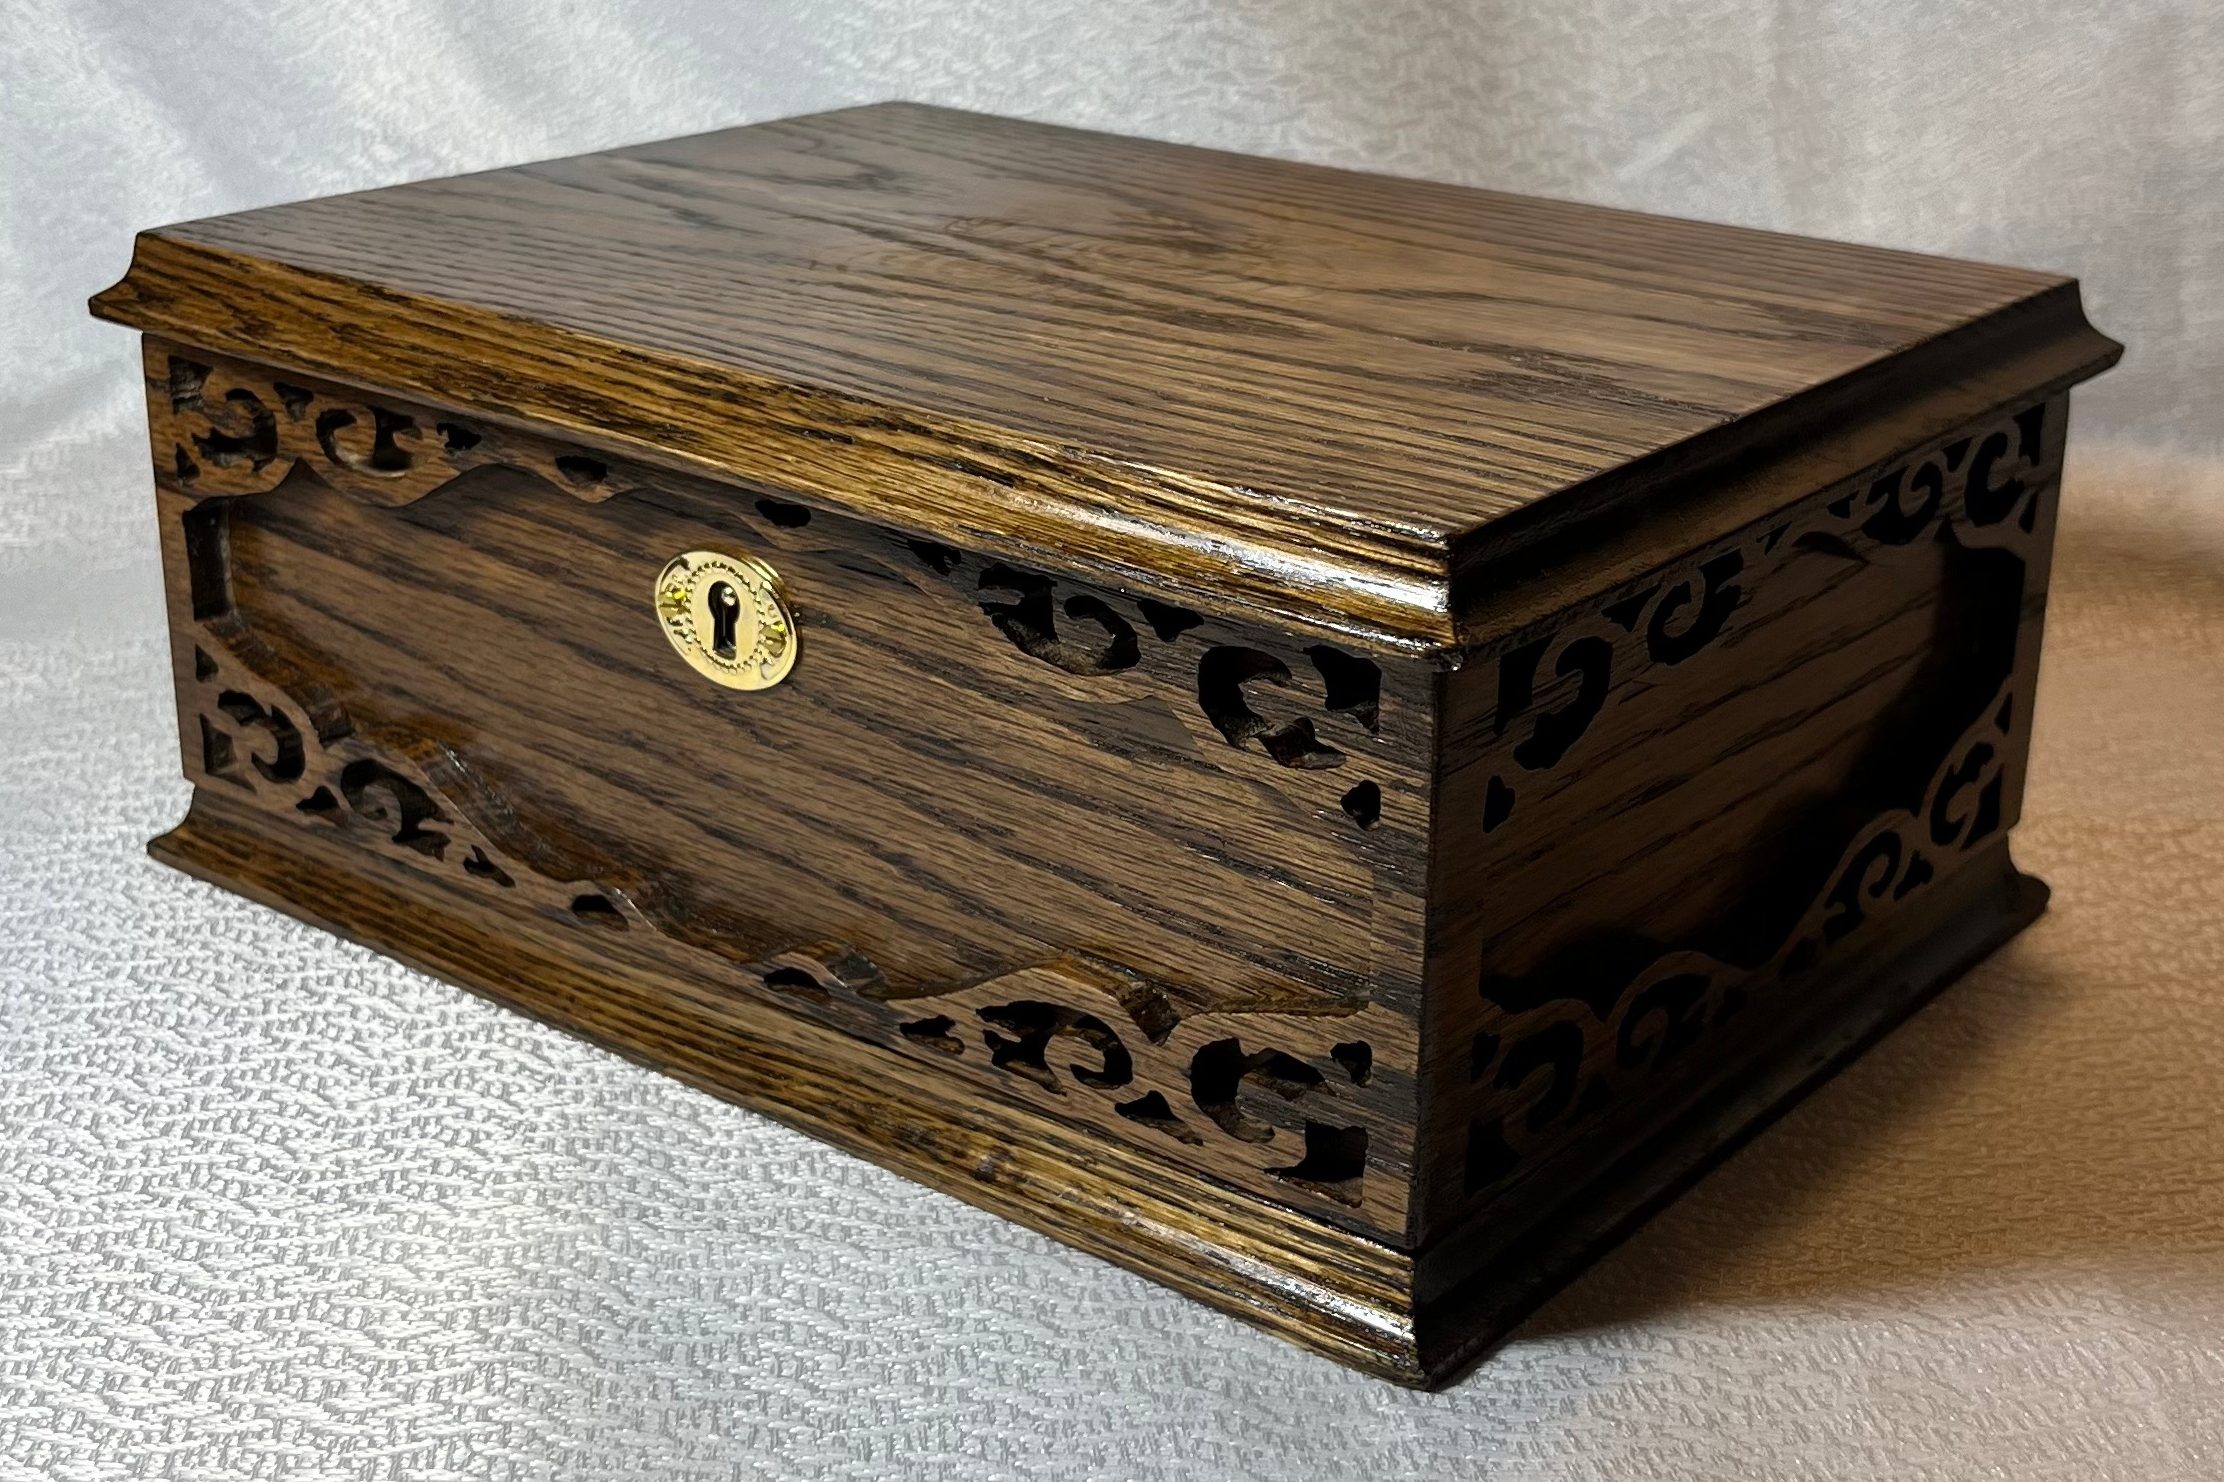
To tie everything together, I designed a rose pattern to match the song and had it laser-etched into the lid.
From there:
- Sanded to 600 grit
- Adjusted fit with miniature planes
- Applied a dark stain
- Finished with multiple coats of polyurethane, sanded back for a soft gloss
Finished with classic hardware and final assembly.
Closing Thoughts
This project pushed me more than I expected.
It forced me to plan more carefully, troubleshoot more deeply, and bridge gaps between disciplines that don’t always play nicely together. The electronics alone went through multiple dead ends before landing on something reliable.
But that’s also what made it work.
It’s easily one of my favourite builds—not just because of how it turned out, but because of everything it required to get there.
And I’m already thinking about what the next version looks like.
Check out the video for this project below!


Leave a comment